My stash of fabric has grown immensely thanks to my Aunt Lil cleaning hers out. I have so many fabrics that have inspired me! They range from groovy 60's prints to solids to shirting to wovens. One in particular struck me as PERFECT for Meadow Mist Designs' "Magnolia Mystery."
This fabric is a neon chartreuse that defies photography. I have taken pictures of it in all sorts of light inside & outside and none show it to its full, eye-shocking brilliance. Oh, but I'm using it and I just love it.
This fabric is a neon chartreuse that defies photography. I have taken pictures of it in all sorts of light inside & outside and none show it to its full, eye-shocking brilliance. Oh, but I'm using it and I just love it.
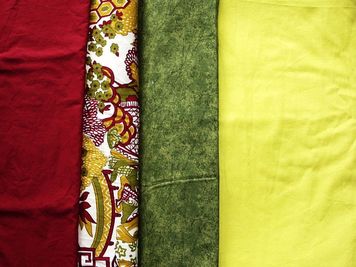
These are my fabrics for the MM quilt: A, B (another of Aunt Lil's) C, and D, which looks bright here but still looks dull compared to the fabric itself. Oh well, I have to just let it go!
We were supposed to cut it all up in August, but my sewing room had been transformed back into a dining room so that didn't happen. Then September's instructions came out and it was all about the HSTs. They are so fundamental, but I really don't enjoying cutting & marking & sewing & trimming those things one by one, so I try not to.
And I didn't have to! Since nothing was cut, I could use my favorite method for HSTs which is an 8-at-a-time square. Use the formula, cut a big square, mark once, sew, cut it up & you have 8. I love that!
So the formula is simple: use the finished size of your unit (sewn into the block--no seam allowance here), add 1 and double. That gives you the size of the square to cut. For the MM quilt (I'm making the lap quilt):
- 2 inch finished HST
2 + 1 = 3
3 x 2 = 6 in. square
We need 72 HSTs for this quilt. Luckily, that's evenly divisible by 8, so I cut out 9 6-inch squares of both fabrics A & D. I pair them, mark the center lines from corner to corner, add 1/4" sewing lines on either side and sew them.
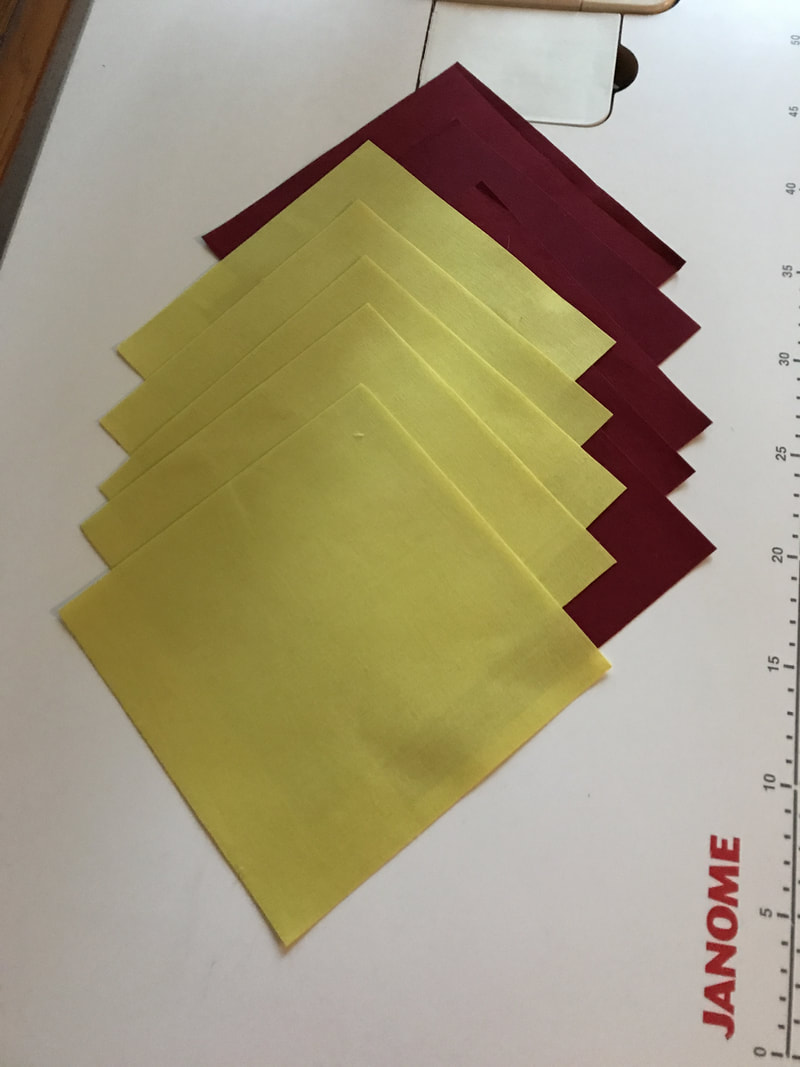
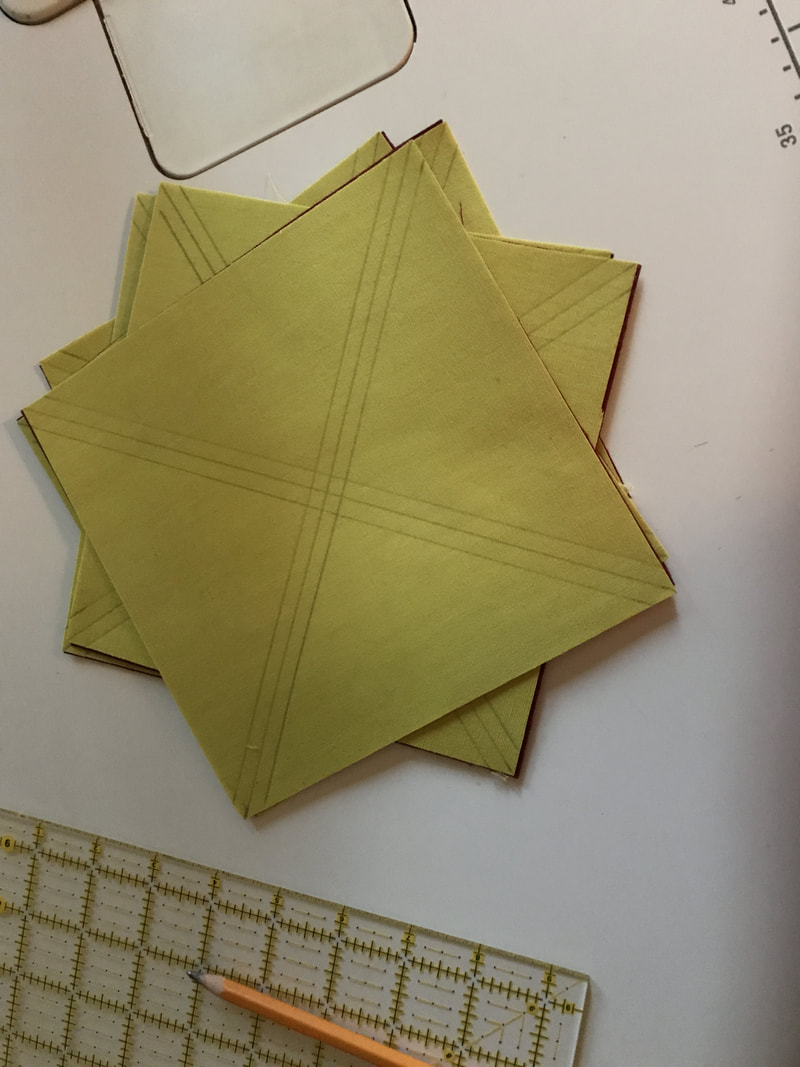
You can see how the sewing makes the squares warble-y, and one square, cut as-is, came out not squared up, so I pressed the rest before cutting & they were fine.
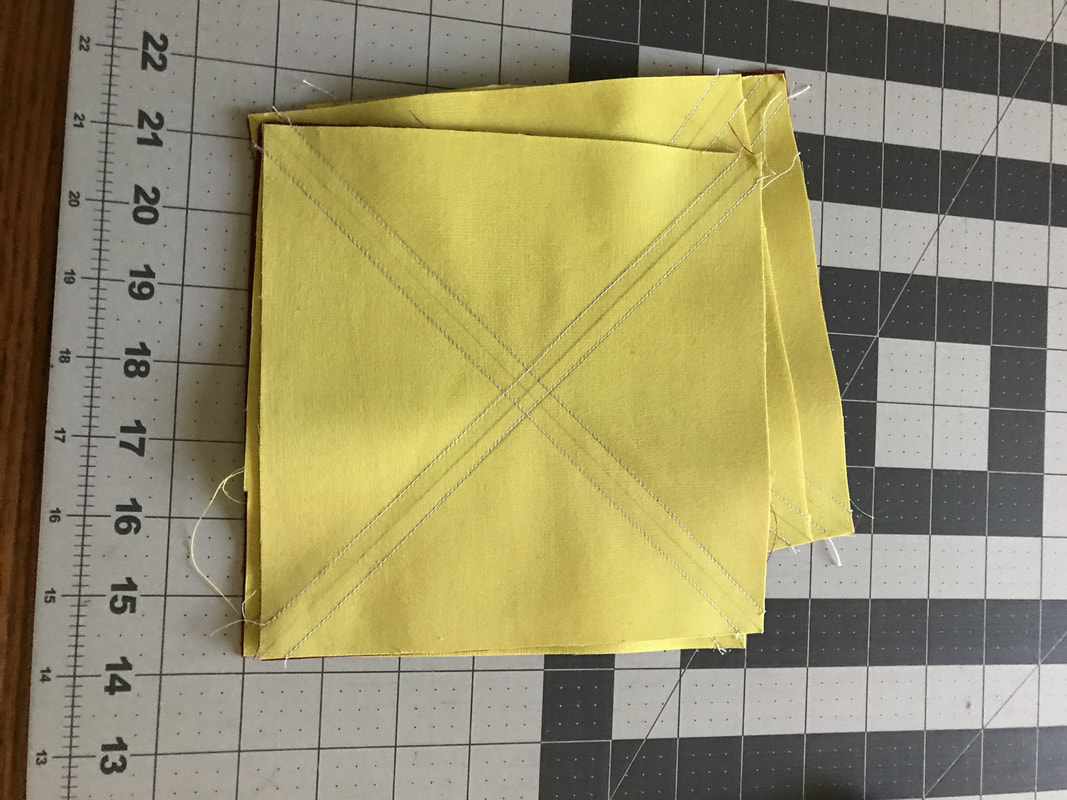
Here's how you cut them. Start by placing your ruler to align with the bottom edge of the square & cut directly through the cross in the middle, the lines that start at the corners. Carefully move your ruler to align with the left edge and cut through that center again, from top to bottom (don't let the pieces move between cuts). Then cut right on those center lines you drew. Ta-da! 8 HSTs to press & trim. And with only 36 cuts, you have 72 HSTs.
Here's how you cut them. Start by placing your ruler to align with the bottom edge of the square & cut directly through the cross in the middle, the lines that start at the corners. Carefully move your ruler to align with the left edge and cut through that center again, from top to bottom (don't let the pieces move between cuts). Then cut right on those center lines you drew. Ta-da! 8 HSTs to press & trim. And with only 36 cuts, you have 72 HSTs.
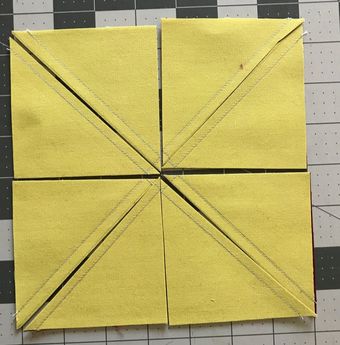
The first cut is side-to-side. Keep the pieces exactly aligned & make the 2nd cut top-to-bottom. Then slice the center lines for 8
That went fast! I still have to trim them and begin the half flying geese, but that's the task for October so I'm on time.


 RSS Feed
