I made my daughter a quilt when she was two: pink and white and green appliqued baskets and flowers on a white background. It is so pretty! And, it turns out, not her at all. She asked for a quilt in her colors--her favorite colors--and I jumped at the chance to make it for her.
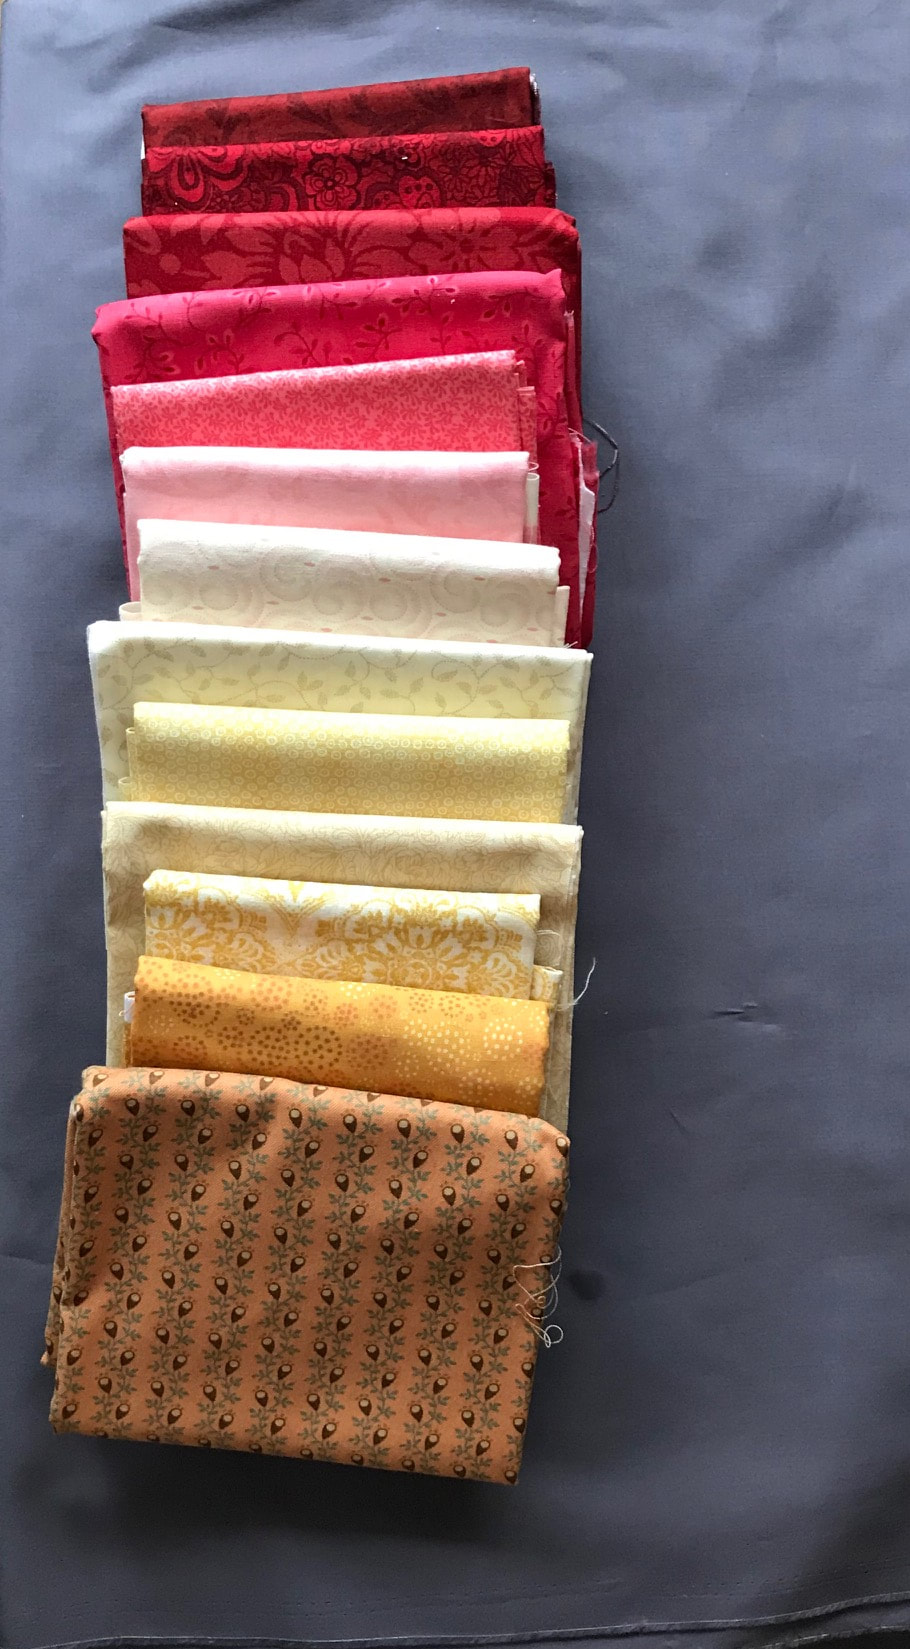
She saw the French Braid design and fell in love with it. I offered some similar designs that look more contemporary and modern, but she has her heart set on it. So French Braid it is! After a fun hour or so pulling from my stash, then more time at our local fabric store, The Quilted Thimble, we had fabrics chosen for the color run: deep reds and burgundy through pale pinks & whites to golden tones.
We were so pleased with our choices! She went back to college and I went back to finishing my current project so I could start her quilt.
Figuring it All Out
I found examples with wide sashing and no sashing, using 16, 12 11 or 8 colors, but the most helpful was Ludlow Quilt and Sew's version. She did some math, pulled some fabric and had at it. That's what I wanted to do also.
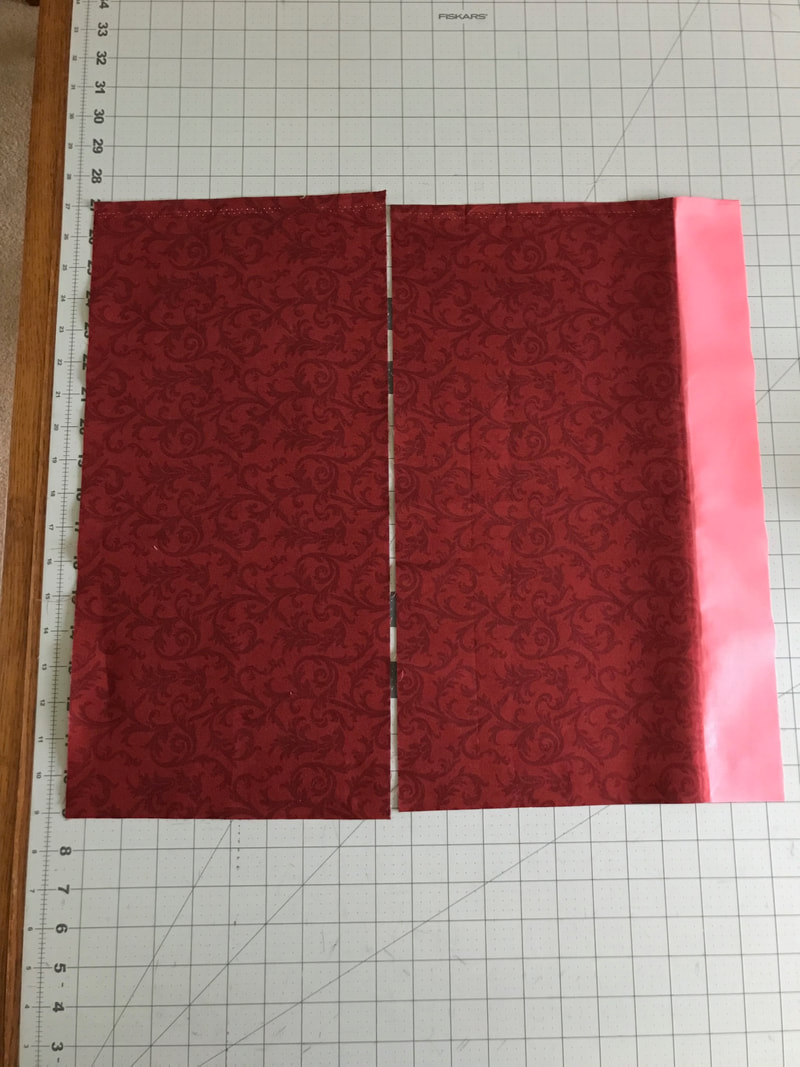
Because we had some fat quarters, and I would need to cut 2 rows of fabric from them, I sized the strips at 2-1/2" x 9" (to be able to get 2 from the 18" width). I drew a quick sketch & measured the size for the center square and end triangles, and determined the width of the sashing for a large throw.
At this stage I realized we made a large mistake in our fabric shopping: we never chose an accent color! The squares in the braids, the center square, the end triangles and all the sashing are this fabric. It it sets the tone of the entire quilt.
Back to fabric shopping because I had nothing in my stash that worked! I bought a cool grey solid that I thought would contrast nicely. And while I was there, I also bought 3 yards of a coral solid (because of the 2019 Pantone Color of the Year: Living Coral) to use on an as-yet un-designed quilt.
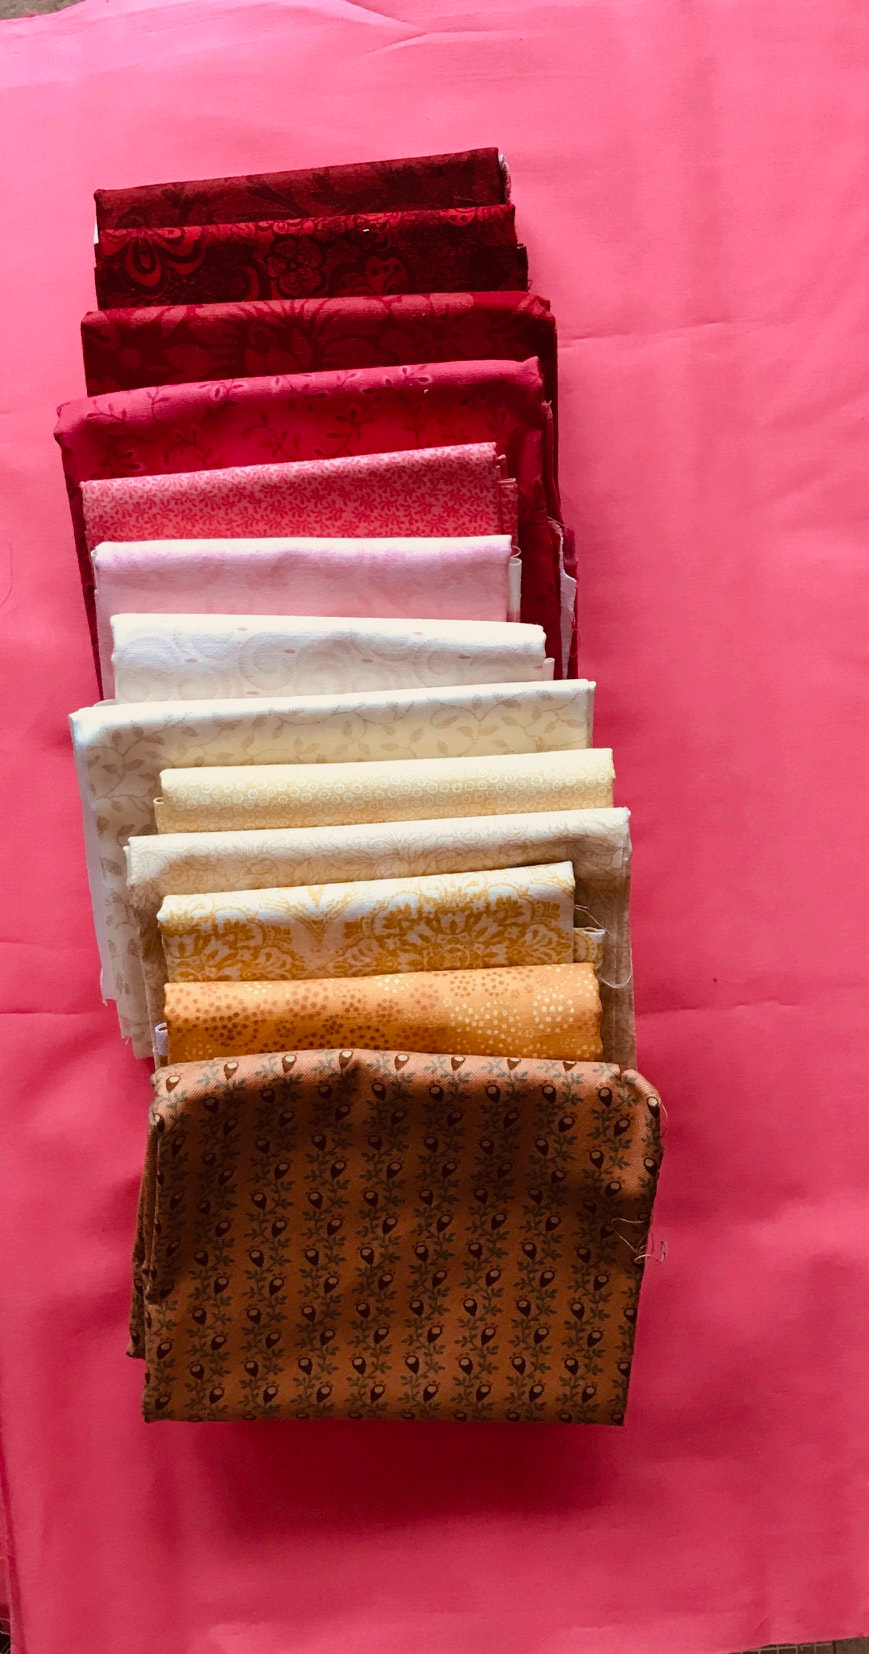
I displayed our fabric choices on the grey and photographed it to send for my daughter's yes or no. I was goofing around with the coral and thought, Wow--wouldn't that be bright! as an accent & photographed that with the fabrics too. As a joke. But just look at it! We decided it worked and I put the grey aside for another project.
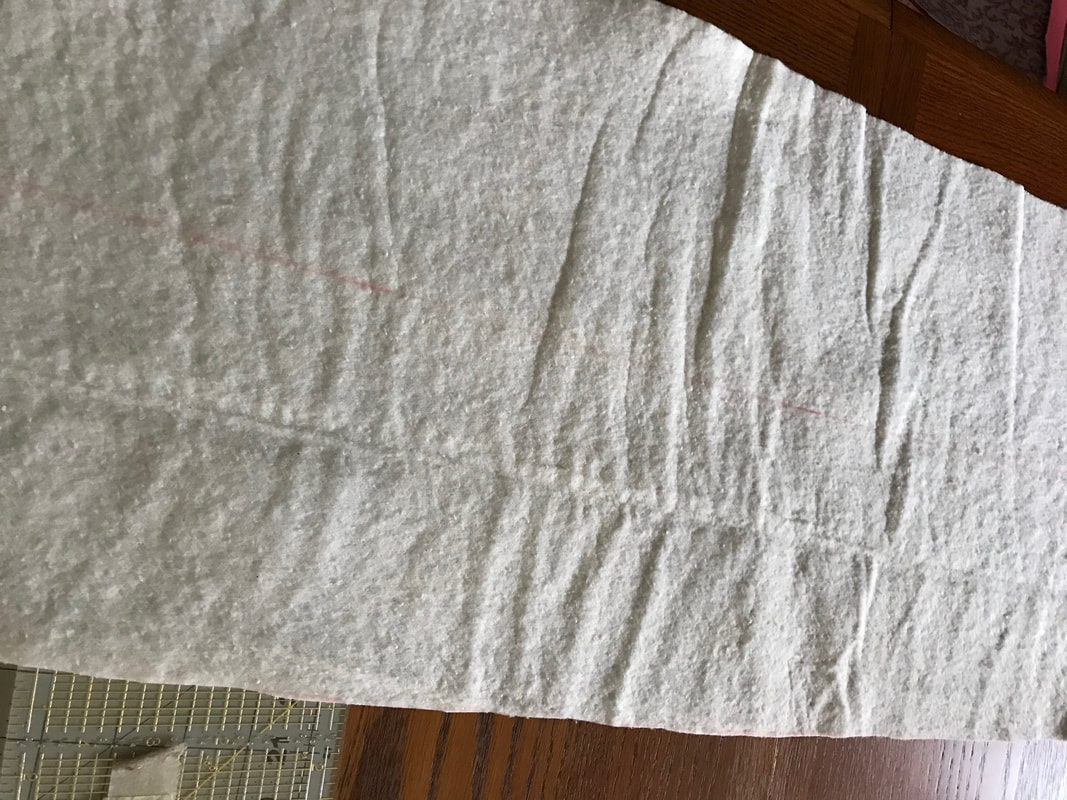
The way this design builds on itself, and the sections joined by sashing, made me think this could be built with the "Quilt As You Go" method. I had used it it once when I made my bargello quilt, so I understand the basic principles. I decided that was the way to go. I had to have my batting and backing before I could start sewing to do it with this method.
At this point, I decided to take my time so I would get it right. My 'One Monthly Goal' for January was going to be assembling and cutting all my strips, then sewing just the 4 sections.
At this point, I decided to take my time so I would get it right. My 'One Monthly Goal' for January was going to be assembling and cutting all my strips, then sewing just the 4 sections.

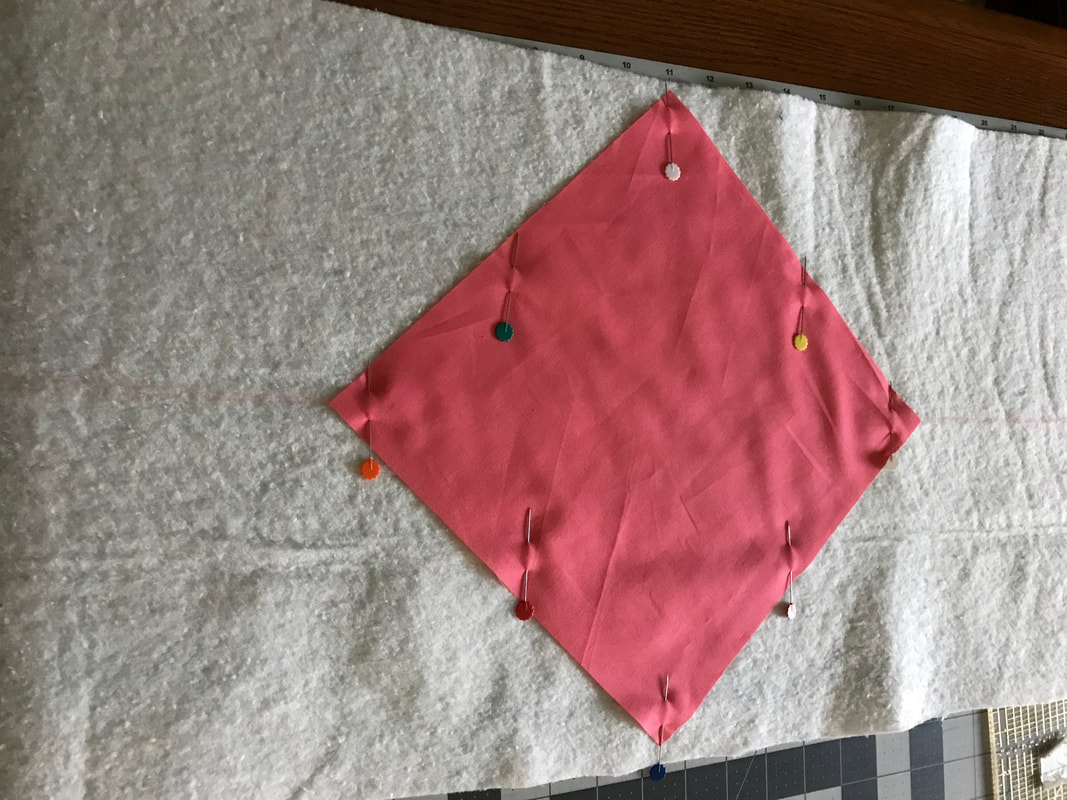
I pulled several tan fabrics from my stash for the backing and cut those into the section sizes, plus a couple side inches, and cut my batting too. It took me less than an afternoon to assemble and cut all my strips. A few picture texts back and forth between my daughter and I set the color run design. A center line down the middle of each batting section, centering the square lengthwise, and I was ready to sew.

Starting with the center square, we decided on burgundy from both sides. That's the way I set up my fabric pieces to pull for sewing.
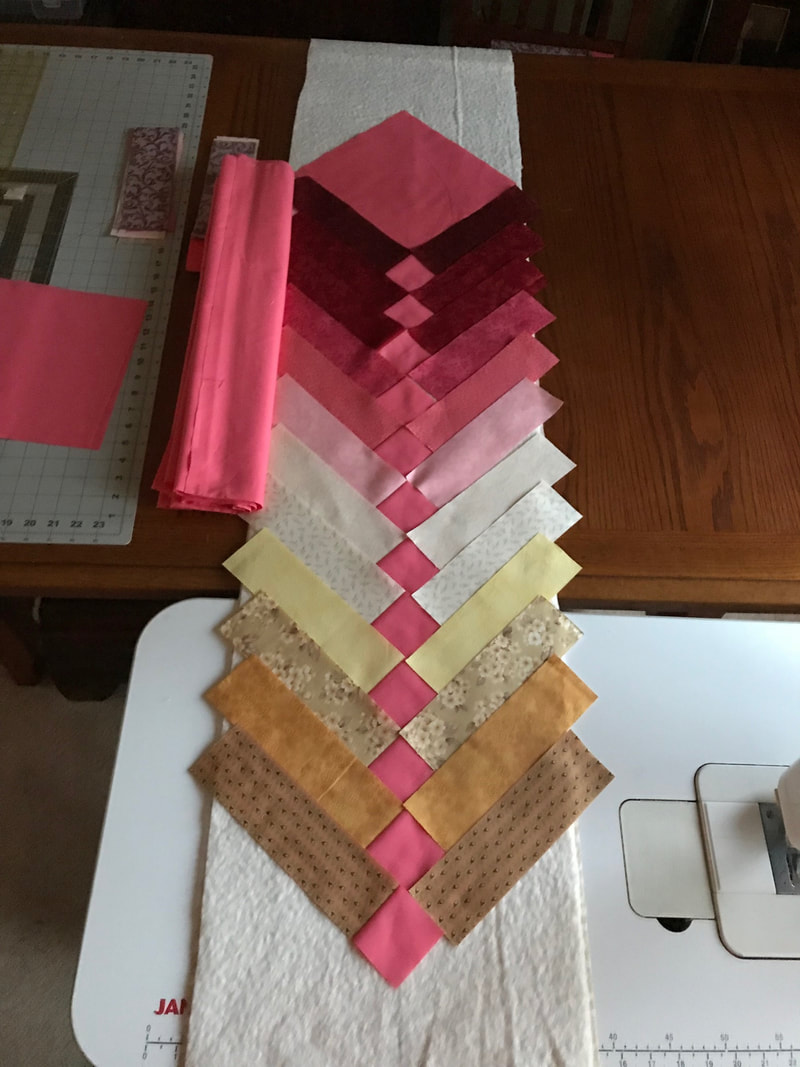
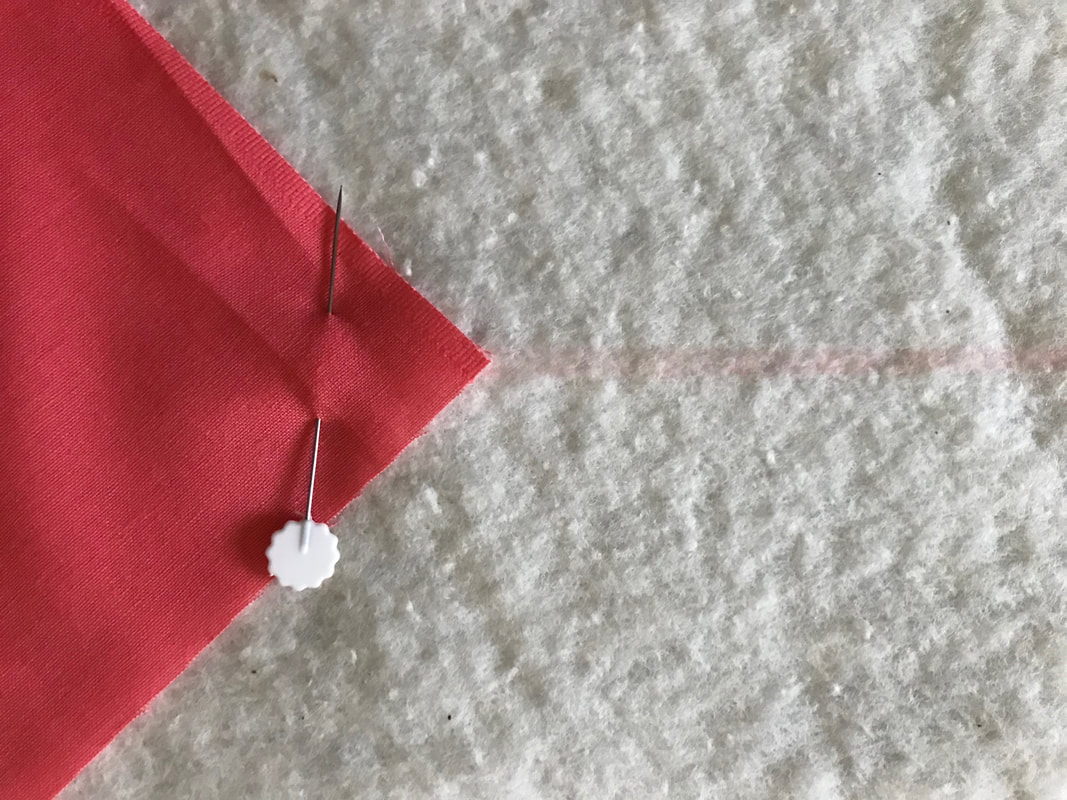
With the center square pinned in place, I started sewing a single strip to one side of the square, then the same color (with an accent square) to the other.
With the center square pinned in place, I started sewing a single strip to one side of the square, then the same color (with an accent square) to the other.
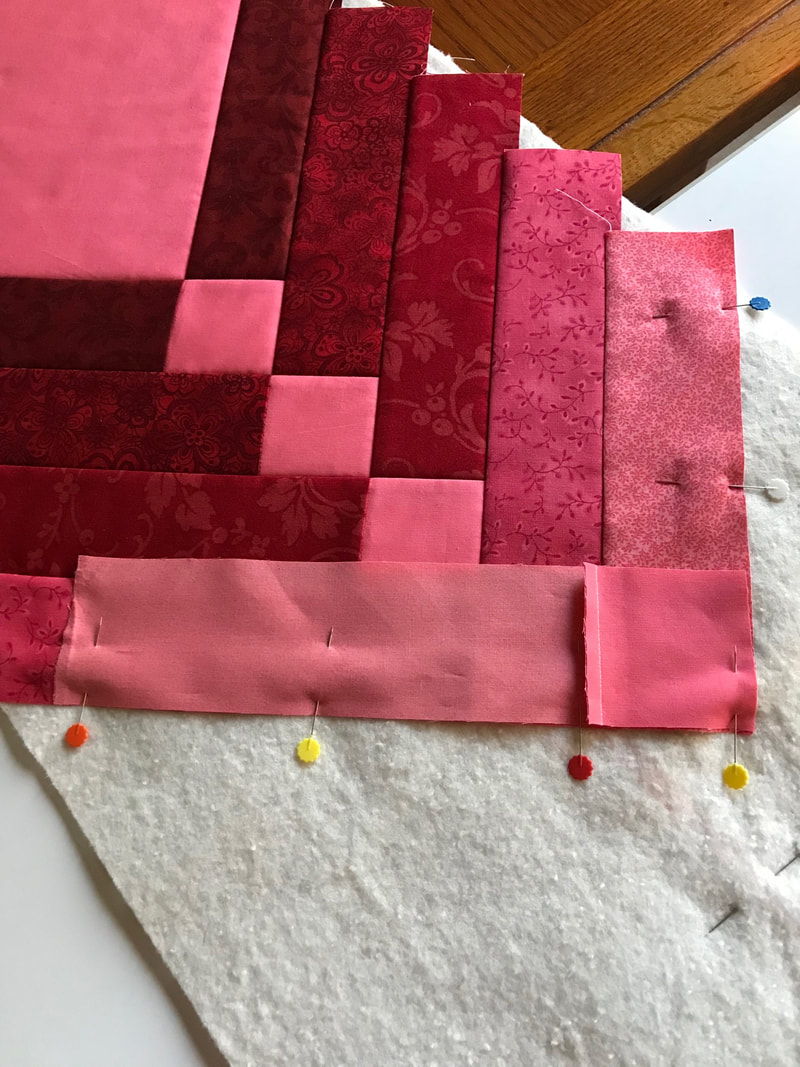
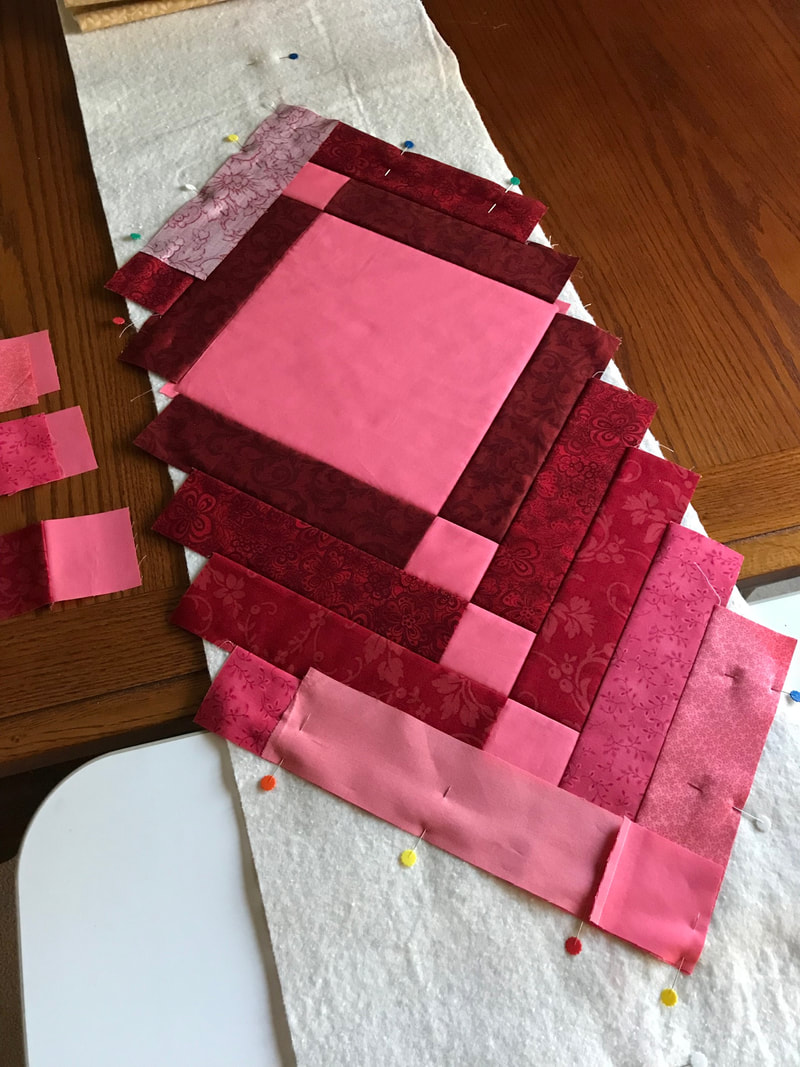
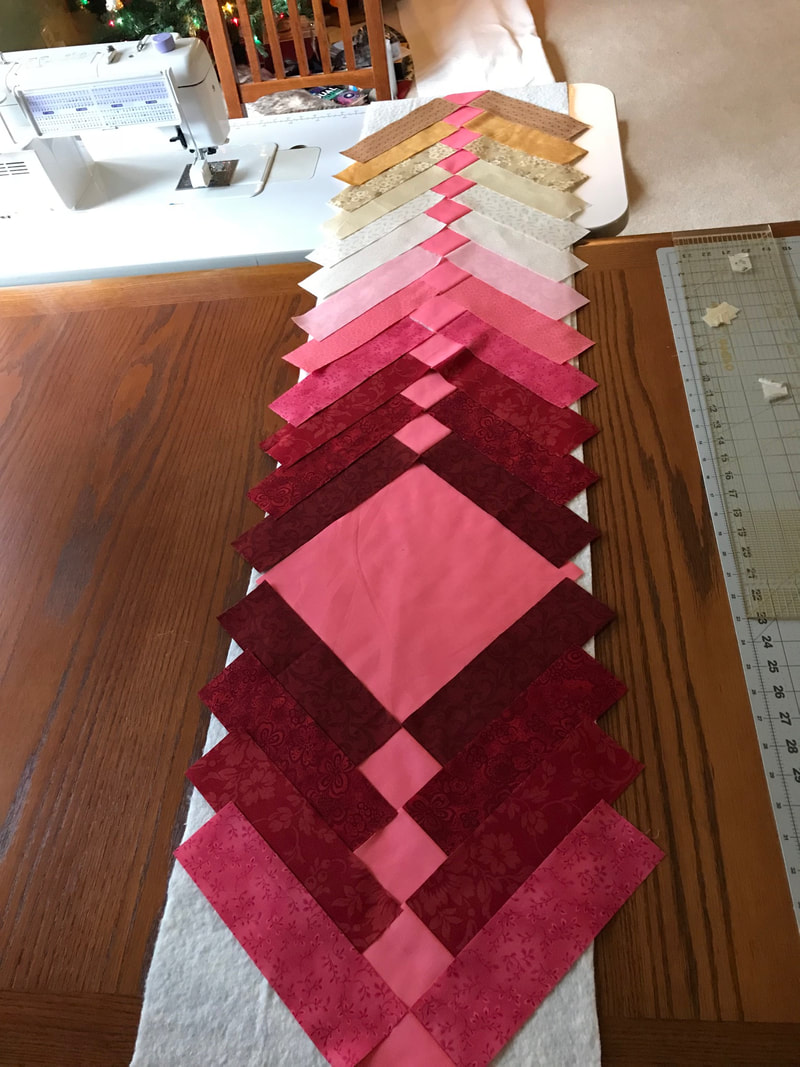
The assembly of the sections went quickly and I realized after several were complete that I would need 1 more than planned on for a total of 5 sections. Quick calculations told me I had just enough accent fabric. Just enough!
The sections, trimmed and sashing attached.
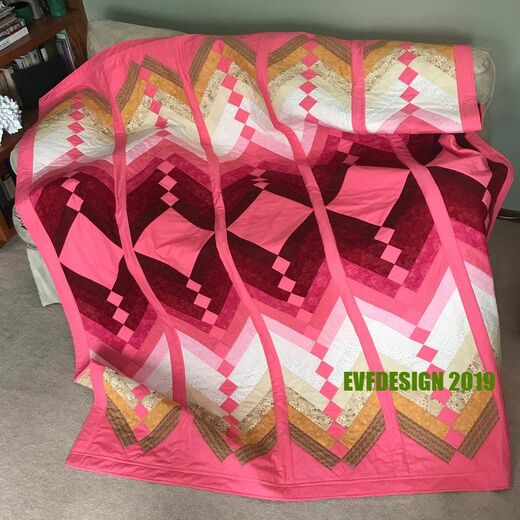
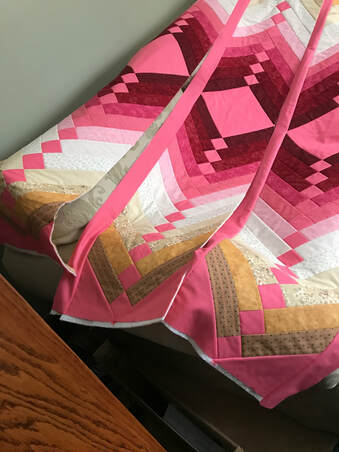
To assemble the sashing, I cut 2" wide strips of batting and sewed the front pieces & one edge of the back by machine, and the last seam by hand. A day later the binding was complete and the quilt was done!
My daughter saw it online and loves it, but won't be able to snuggle under it until spring break. I hope she enjoys it as much as I did making it for her!
My daughter saw it online and loves it, but won't be able to snuggle under it until spring break. I hope she enjoys it as much as I did making it for her!


 RSS Feed
